PROTECTED SOURCE SCRIPT
Auction S/D Zones (Pivot + Volume + ATR) - S9Trader
Short Summary
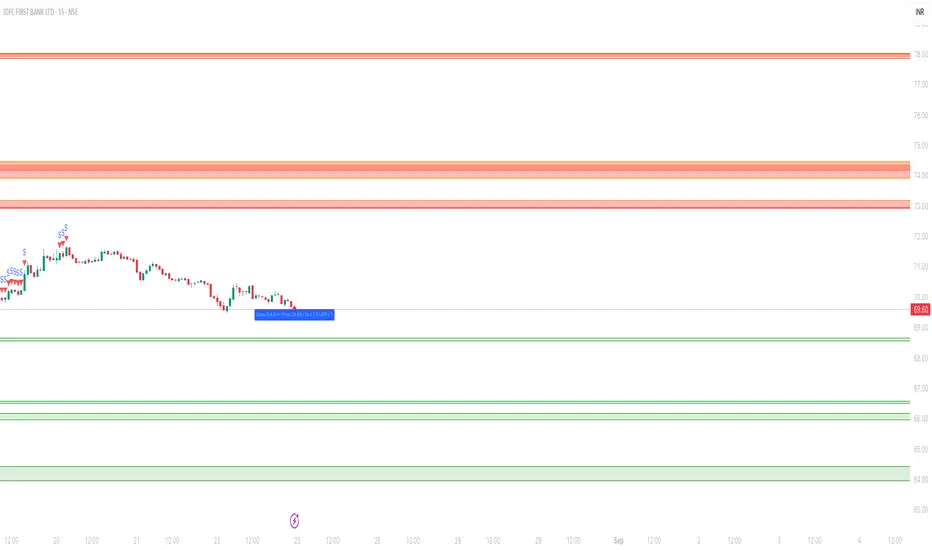
Plots high-probability Supply & Demand zones from confirmed pivots, validated by volume and an ATR-impulse filter. Highlights the first retest, supports optional invalidation, and includes touch alerts. Works on any symbol and timeframe.
Script Description
What it does
Detects swing highs/lows (confirmed pivots) and draws Supply (red) / Demand (green) zones.
Confirms potential institutional activity with Volume > SMA × multiplier.
Requires an impulse move at the pivot (range ≥ ATR × multiplier) to avoid weak swings.
Extends zones to the right, highlights the first touch, and can invalidate zones on clean breaks.
Provides alerts when price touches an active zone.
Principles (why it works)
Auction Market Theory: Markets rotate between balance and imbalance; sharp moves often mark “unfair” highs/lows that react on retest.
Supply/Demand Mapping: Swing highs tend to act as Supply on revisit; swing lows as Demand.
Volume Confirmation: Above-average pivot volume suggests non-retail participation.
ATR Impulse: Prioritizes pivots formed by meaningful range expansion, not noise.
How it works (logic)
Pivot detection: ta.pivothigh/low(leftBars, rightBars) confirms a swing after rightBars candles.
Zone construction: Supply = top at pivot high, bottom at max(open, close). Demand = bottom at pivot low, top at min(open, close). Optional minimum % height filter.
Filters: Volume > SMA(Volume, volLen) × volMult AND true range ≥ ATR × impATRmult.
Management: Keeps up to maxZones per side; highlights first retest; invalidates on decisive close through the far edge.
Alerts: Triggers when the current bar intersects any active zone.
Inputs (recommended starting points)
Pivot Left/Right Bars (5/5): Higher = stronger, fewer zones. Intraday: 3–6; Swing: 8–12.
Volume SMA Length (20) & High-Volume Multiplier (1.5–2.0): Higher = stricter.
ATR Length (14) & Impulse Multiplier (1.0–1.5): Higher = stricter.
Min Zone Height % (0.05–0.15%): Skip micro-zones.
Max Zones / Side (5–15): Reduce clutter & stay within object limits.
Invalidate on Break: Remove “proven wrong” zones.
Highlight First Touch: Emphasize the first interaction.
Extend Left: Optional historical context.
How to use (playbook)
Start with context: Identify the higher-timeframe trend/structure.
Prioritize first touch: Reactions are typically strongest on the first revisit.
Seek confluence: Favor zones aligned with trend or near HTF levels, VWAP/MA confluence, or round numbers.
Risk: Place stops just beyond the zone; size so a clean break is tolerable.
Targets: Mid-range, opposite side of the session’s rotation, or next HTF level; trail if momentum persists.
Alerts available
Supply Zone Touch
Demand Zone Touch
Notes & limitations
Pivots confirm only after rightBars candles; zones appear at the confirmed pivot (no instant hindsight).
Order flow/footprint is not available in Pine; bar volume is used as a proxy.
Drawing objects are limited by TradingView; keep maxZones modest on long histories.
Indicator only (not a strategy); backtesting requires a separate strategy script.
Changelog
v1.0.0 — Initial release: pivots + volume + ATR impulse, first-touch highlight, invalidation, alerts, zone caps.
Disclaimer
For educational purposes only. Not financial advice. Trading involves risk—do your own research and manage risk.
Skrip dilindungi
Skrip ini diterbitkan sebagai sumber tertutup. Akan tetapi, anda boleh menggunakannya secara bebas dan tanpa apa-apa had – ketahui lebih di sini.
Penafian
Maklumat dan penerbitan adalah tidak bertujuan, dan tidak membentuk, nasihat atau cadangan kewangan, pelaburan, dagangan atau jenis lain yang diberikan atau disahkan oleh TradingView. Baca lebih dalam Terma Penggunaan.