Penny King**Penny King Trend Indicator**
The **Penny King** is a powerful and versatile trend-following indicator designed to assist traders in identifying market trends and dynamic support/resistance levels. This tool effectively leverages Adaptive True Range (ATR) and Exponential Moving Average (EMA) or a Delta Price method to establish a trailing stop level, ensuring traders can capture strong trends while minimizing risk.
### **Key Features:**
1. **Dual Calculation Modes:**
- **ATR & EMA-Based Mode (Mode 0)**: Uses ATR (Average True Range) and EMA (Exponential Moving Average) to determine the trailing stop level dynamically.
- **Delta Price Mode (Mode 1)**: Utilizes a fixed price change threshold (Delta Price) to define stop levels based on market volatility.
2. **Adjustable Parameters for Customization:**
- **Range (akk_range)**: Defines the lookback period for the ATR calculation.
- **IMA Range (ima_range)**: Specifies the EMA smoothing factor applied to the ATR.
- **Factor (akk_factor)**: Multiplier applied to the ATR-based calculation to refine trailing stop sensitivity.
- **Delta Price (DeltaPrice)**: Fixed price-based stop level for an alternative trend calculation.
3. **Intelligent Trailing Stop Mechanism:**
- The trailing stop level dynamically adjusts based on price movement, following the trend while preventing premature exits.
- If the price moves in favor of the trend, the stop level is adjusted accordingly to lock in profits.
- If the price reverses against the trend, the stop level remains intact until a new trend direction is established.
4. **Efficient Market Adaptability:**
- The ATR-based method ensures adaptability to changing market conditions, expanding stop levels in high volatility and tightening them in low volatility periods.
- The Delta Price method offers a fixed approach, ideal for traders who prefer a non-ATR-based system for managing stop levels.
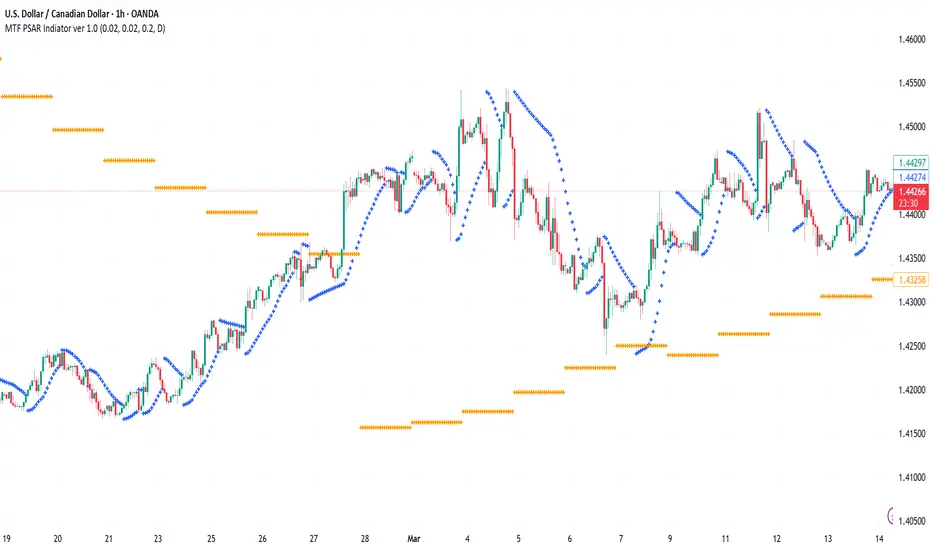
5. **Clean Visual Representation:**
- The indicator plots a clear, orange-colored trend stop line that dynamically follows the market movement.
- Provides a visual cue to determine potential entry and exit points efficiently.
### **How to Use:**
- **Trend Confirmation:**
- If the price remains above the trend stop line, it signals a bullish trend.
- If the price falls below the trend stop line, it indicates a bearish trend.
- **Trade Entries & Exits:**
- Consider long positions when the price remains above the trend stop.
- Consider short positions when the price stays below the trend stop.
- Utilize the trend stop line as a dynamic trailing stop-loss mechanism to protect gains and minimize losses.
- **Parameter Optimization:**
- Adjust the **Range**, **IMA Range**, and **Factor** to optimize settings based on the trading asset and time frame.
- Experiment with **Delta Price Mode** for assets where fixed price-based trailing stops are more effective.
### **Conclusion:**
The **Penny King Trend Indicator** is an essential tool for traders looking to capture market trends while ensuring effective risk management. Whether you prefer ATR-based adaptability or a fixed price stop approach, this indicator provides the flexibility needed to navigate different market conditions successfully. By integrating the **Penny King**, traders can enhance their trading strategy with a reliable and efficient trend-following system.
Penunjuk Pine Script®