Multi-Timeframe Strength Scanner [JOAT]Multi-Timeframe Strength Scanner
Introduction
The Multi-Timeframe Strength Scanner is an open-source indicator that combines higher timeframe trend analysis with current timeframe momentum indicators to create a comprehensive market strength assessment system. This mashup integrates ADX (Average Directional Index), Donchian Channels, VWAP (Volume Weighted Average Price), RSI divergence detection, and multi-timeframe EMA analysis into a unified scanner that identifies when trend strength aligns across multiple timeframes.
The indicator addresses a critical trading challenge: signals that look strong on one timeframe often fail because higher timeframes are moving in the opposite direction. By analyzing 15-minute, 1-hour, and 4-hour timeframes simultaneously while monitoring current timeframe momentum, this tool helps traders avoid counter-trend trades and identify high-probability setups where multiple timeframes align.
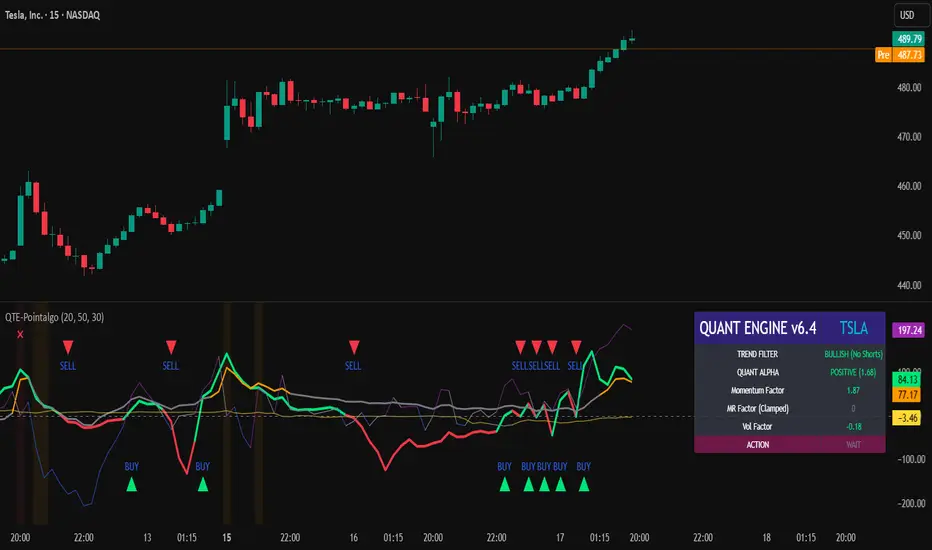
Chart showing multi-timeframe alignment dashboard and strength indicators on 15M timeframe
Why This Mashup Exists
This indicator combines five analytical frameworks that address different aspects of trend strength:
ADX Analysis: Measures trend strength regardless of direction using directional movement
Donchian Channels: Identifies breakouts and trend continuation using price extremes
VWAP: Shows institutional average price and volume-weighted fair value
RSI Divergence: Detects momentum exhaustion at current timeframe swing points
Multi-Timeframe EMAs: Confirms trend direction across 15M, 1H, and 4H timeframes
Each component serves a specific purpose: ADX quantifies trend strength, Donchian Channels identify breakout momentum, VWAP reveals institutional positioning, RSI divergences warn of reversals, and multi-timeframe EMAs ensure directional alignment. Together, they create a strength scanner that filters out weak, counter-trend setups and highlights only those with multi-timeframe confirmation.
The mashup is justified because these components use fundamentally different data (directional movement, price extremes, volume-weighted averages, momentum oscillators, moving averages) that respond to different market conditions. When they align, it indicates genuine trend strength rather than temporary momentum.
Core Components Explained
1. ADX Trend Strength System
ADX (Average Directional Index) measures trend strength on a scale of 0-100:
= ta.dmi(adxLength, adxLength)
// Trend strength classification
strongTrend = adx > adxThreshold // Default: 20
veryStrongTrend = adx > 40
extremeTrend = adx > 60
// Direction determination
bullishTrend = plus > minus
bearishTrend = minus > plus
ADX interpretation:
ADX < 20: Weak trend or ranging market - avoid trend-following strategies
ADX 20-40: Moderate trend strength - standard trend-following viable
ADX 40-60: Strong trend - high-probability trend continuation
ADX > 60: Extreme trend - potential exhaustion or very strong momentum
The indicator plots ADX as a line with color coding:
Green: Strong bullish trend (ADX > 20, +DI > -DI)
Red: Strong bearish trend (ADX > 20, -DI > +DI)
Gray: Weak trend or ranging (ADX < 20)
2. Donchian Channel Breakout System
Donchian Channels track the highest high and lowest low over a specified period:
donchianLength = 20 // Configurable
upperChannel = ta.highest(high, donchianLength)
lowerChannel = ta.lowest(low, donchianLength)
midChannel = (upperChannel + lowerChannel) / 2
Breakout signals:
Bullish Breakout: Close above upper channel = new 20-bar high
Bearish Breakout: Close below lower channel = new 20-bar low
Channel Position: Price near upper channel = bullish strength, near lower = bearish strength
The indicator uses Donchian breakouts to confirm trend strength. When price breaks out of the channel with strong ADX, it signals high-momentum trend continuation.
3. VWAP Analysis
VWAP (Volume Weighted Average Price) calculates the average price weighted by volume:
vwap = ta.vwap(hlc3)
// Position analysis
aboveVWAP = close > vwap // Bullish positioning
belowVWAP = close < vwap // Bearish positioning
// Distance from VWAP
vwapDistance = ((close - vwap) / vwap) * 100
VWAP significance:
Institutional traders use VWAP as benchmark for execution quality
Price above VWAP = buyers in control, institutions paying premium
Price below VWAP = sellers in control, institutions getting discount
Large distance from VWAP = potential mean reversion opportunity
VWAP acts as dynamic support/resistance level
The indicator plots VWAP with dynamic coloring based on price position and uses it for trend confirmation.
4. RSI Divergence Detection
The indicator detects divergences using pivot-based analysis:
rsi = ta.rsi(close, 14)
// Identify swing points
pivotHigh = ta.pivothigh(rsi, 5, 5)
pivotLow = ta.pivotlow(rsi, 5, 5)
// Compare current pivot with previous pivot
bullishDivergence = price makes lower low AND rsi makes higher low
bearishDivergence = price makes higher high AND rsi makes lower high
Divergence types:
Regular Bullish: Price LL, RSI HL - momentum improving, potential reversal up
Regular Bearish: Price HH, RSI LH - momentum deteriorating, potential reversal down
Hidden Bullish: Price HL, RSI LL - trend continuation signal in uptrend
Hidden Bearish: Price LH, RSI HH - trend continuation signal in downtrend
Divergences are marked with "DIV" labels and used to warn of potential trend exhaustion or continuation.
5. Multi-Timeframe EMA Analysis
The indicator analyzes trend direction across three higher timeframes:
// Request higher timeframe data
htf15mEMA = request.security(syminfo.tickerid, "15", ta.ema(close, 21))
htf1hEMA = request.security(syminfo.tickerid, "60", ta.ema(close, 21))
htf4hEMA = request.security(syminfo.tickerid, "240", ta.ema(close, 21))
// Determine trend direction
htf15mBullish = close > htf15mEMA
htf1hBullish = close > htf1hEMA
htf4hBullish = close > htf4hEMA
// Count aligned timeframes
bullishCount = (htf15mBullish ? 1 : 0) + (htf1hBullish ? 1 : 0) + (htf4hBullish ? 1 : 0)
bearishCount = (!htf15mBullish ? 1 : 0) + (!htf1hBullish ? 1 : 0) + (!htf4hBullish ? 1 : 0)
Alignment classification:
STRONG BULL: All 3 timeframes bullish (3/3 alignment)
BULL: 2 out of 3 timeframes bullish
MIXED: Timeframes conflicting (1-1-1 or 2-1 split)
BEAR: 2 out of 3 timeframes bearish
STRONG BEAR: All 3 timeframes bearish (3/3 alignment)
Example showing multi-timeframe alignment dashboard with all three timeframes bullish
Strength Scoring System
The indicator calculates a comprehensive strength score (0-100) by evaluating:
Strength Score Components:
- ADX Strength: Up to 25 points (ADX > 40 = 25, ADX > 20 = 15, ADX < 20 = 0)
- ADX Direction: Up to 15 points (+DI > -DI = 15 for bull, -DI > +DI = 15 for bear)
- Donchian Position: Up to 15 points (breakout = 15, near channel = 10, mid-channel = 5)
- VWAP Position: Up to 15 points (above VWAP = 15 for bull, below = 15 for bear)
- MTF Alignment: Up to 20 points (3/3 = 20, 2/3 = 13, 1/3 = 7)
- RSI Level: Up to 10 points (healthy range = 10, extreme = 5, divergence = -5)
Score interpretation:
80-100: Extremely strong trend - high-probability continuation
60-79: Strong trend - favorable for trend-following
40-59: Moderate trend - selective trend trades
20-39: Weak trend - caution, potential reversal
0-19: Very weak or counter-trend - avoid trend-following
The dashboard displays the strength score with color coding and individual component breakdown.
Visual Elements
ADX Line: Main trend strength indicator with dynamic coloring
+DI/-DI Lines: Directional movement indicators
ADX Threshold: Horizontal line at 20 (configurable)
Donchian Channels: Upper, middle, and lower channel lines
VWAP Line: Volume-weighted average price with dynamic coloring
Divergence Labels: "DIV" markers at RSI divergence points
Strength Bars: Background coloring based on strength score
Dashboard: Comprehensive table showing:
- Current strength score
- ADX value and direction
- Donchian position
- VWAP position
- MTF alignment (15M, 1H, 4H status)
- RSI level
- Overall trend classification
Chart showing strength dashboard with component breakdown and visual indicators
How Components Work Together
The mashup creates a layered strength analysis:
Layer 1 - Trend Strength: ADX quantifies how strong the trend is
Layer 2 - Breakout Momentum: Donchian Channels identify momentum surges
Layer 3 - Institutional Positioning: VWAP shows where smart money is positioned
Layer 4 - Momentum Health: RSI divergences warn of exhaustion
Layer 5 - Multi-Timeframe Confirmation: HTF EMAs ensure directional alignment
Layer 6 - Synthesis: Strength score combines all factors into actionable metric
Example scenario: ADX is 45 (Layer 1), price breaks above Donchian upper channel (Layer 2), trading above VWAP (Layer 3), no RSI divergence (Layer 4), and all three higher timeframes are bullish (Layer 5). The strength score reaches 90 (Layer 6), signaling extremely strong bullish trend with high continuation probability.
Input Parameters
ADX Settings:
ADX Length: Period for ADX calculation (default: 14)
ADX Threshold: Minimum ADX for strong trend (default: 20)
Show +DI/-DI: Toggle directional indicators (default: enabled)
Donchian Settings:
Donchian Length: Period for channel calculation (default: 20)
Show Channels: Toggle channel display (default: enabled)
Breakout Sensitivity: Threshold for breakout signals (default: close beyond channel)
VWAP Settings:
Show VWAP: Toggle VWAP line (default: enabled)
VWAP Reset: Session, Week, Month, or Never (default: Daily)
Distance Alert: Alert when price moves X% from VWAP (default: 2%)
RSI Settings:
RSI Length: Period for RSI calculation (default: 14)
Show Divergences: Toggle divergence markers (default: enabled)
Pivot Lookback: Bars for pivot detection (default: 5)
Multi-Timeframe Settings:
HTF 1: First higher timeframe (default: 15 minutes)
HTF 2: Second higher timeframe (default: 1 hour)
HTF 3: Third higher timeframe (default: 4 hours)
EMA Length: Period for HTF EMAs (default: 21)
Min Alignment: Minimum timeframes aligned for signal (default: 2/3)
Display Options:
Show Dashboard: Toggle strength score table (default: enabled)
Show Strength Bars: Toggle background coloring (default: enabled)
Dashboard Position: Top-right, top-left, bottom-right, bottom-left
Color Theme: Choose between multiple color schemes
How to Use This Indicator
Step 1: Check Multi-Timeframe Alignment
Review the dashboard MTF section. Look for 2/3 or 3/3 alignment in your intended trade direction. Avoid trades when timeframes are mixed or opposing.
Step 2: Verify ADX Strength
Ensure ADX is above 20 (preferably above 30) for trend-following trades. ADX below 20 suggests ranging market where trend strategies underperform.
Step 3: Confirm Donchian Position
Check if price is near or breaking through Donchian channels. Breakouts with strong ADX signal high-momentum moves.
Step 4: Assess VWAP Position
For long trades, prefer price above VWAP. For short trades, prefer price below VWAP. Large distances from VWAP may indicate overextension.
Step 5: Check for Divergences
Look for RSI divergence warnings. If divergence appears with extreme strength score, consider taking profits or tightening stops.
Step 6: Review Strength Score
Use the overall strength score as final filter. Scores above 70 indicate strong trend conditions favorable for trend-following. Scores below 40 suggest caution.
Best Practices
Use on 5-minute to 1-hour timeframes for optimal multi-timeframe analysis
Wait for 2/3 or 3/3 MTF alignment before entering trend trades
Strong ADX (> 30) with MTF alignment produces highest-probability setups
Donchian breakouts with ADX > 25 often lead to sustained moves
VWAP acts as dynamic support/resistance - use for entry refinement
RSI divergences in strong trends often lead to pullbacks, not reversals
Strength score above 80 suggests strong trend continuation potential
Avoid trading when strength score is below 40 unless counter-trend trading
Combine with price action and key levels for precise entries
Indicator Limitations
ADX is lagging indicator - trend strength confirmed after move has started
Donchian breakouts can produce false signals in choppy markets
VWAP resets daily, may not reflect longer-term institutional positioning
Multi-timeframe analysis requires sufficient data history
Strength score is mathematical calculation, not prediction of future movement
Strong trends can reverse suddenly despite high strength scores
Divergences can persist for extended periods in strong trends
Higher timeframe data may repaint on lower timeframes
Requires understanding of trend analysis concepts for effective use
Technical Implementation
Built with Pine Script v6 using:
DMI/ADX calculation with directional indicators
Donchian Channel calculation with breakout detection
VWAP calculation with session reset options
Pivot-based RSI divergence detection
request.security() for multi-timeframe EMA analysis
Comprehensive strength scoring algorithm
Dynamic dashboard with component breakdown
Background coloring based on strength levels
The code is fully open-source and can be modified to adjust timeframes, thresholds, and scoring weights.
Originality Statement
This indicator is original in its multi-timeframe strength integration approach. While individual components (ADX, Donchian Channels, VWAP, RSI divergence, EMAs) are established tools, this mashup is justified because:
It combines trend strength measurement with multi-timeframe directional confirmation
The strength scoring system quantifies trend quality across multiple dimensions
Multi-timeframe analysis prevents counter-trend trades on lower timeframes
Integration of volume-weighted analysis (VWAP) with momentum indicators
Divergence detection provides early warning within trend strength context
Comprehensive dashboard presents complex multi-timeframe data clearly
Each component contributes unique information: ADX measures trend strength, Donchian identifies breakout momentum, VWAP shows institutional positioning, RSI divergences warn of exhaustion, and MTF EMAs ensure alignment. The mashup's value lies in filtering out weak, counter-trend setups and highlighting only those with genuine multi-timeframe strength confirmation.
Disclaimer
This indicator is provided for educational and informational purposes only. It is not financial advice or a recommendation to buy or sell any financial instrument. Trading involves substantial risk of loss and is not suitable for all investors.
Trend strength indicators are lagging tools that confirm trends after they've begun. Strong trends can reverse suddenly, and high strength scores do not guarantee trend continuation. Multi-timeframe analysis does not eliminate the risk of losses.
The strength score is a mathematical calculation based on current market data, not a prediction of future price movement. Past trend strength does not guarantee future performance. Market conditions change, and trends that appear strong can reverse without warning.
Always use proper risk management, including stop losses and position sizing appropriate for your account size and risk tolerance. Never risk more than you can afford to lose. Consider consulting with a qualified financial advisor before making investment decisions.
The author is not responsible for any losses incurred from using this indicator. Users assume full responsibility for all trading decisions made using this tool.
-Made with passion by officialjackofalltrades
Penunjuk Pine Script®